Verified and Tested 03/1/16 Introduction In this How-To, we…
February 26, 2021
Ubuntu 20.04/20.10 安装LAMP, Install LAMP on Ubuntu 20.04 with Apache, MariaDB, Mysql, PHP7.4, How to Install LAMP Stack on Ubuntu 20.04 Server/Desktop
本教程将向您展示如何在Ubuntu 20.04/20.10 上安装LAMP堆栈。软件堆栈是捆绑在一起的一组软件工具。LAMP代表Linux,Apache,MariaDB / MySQL和PHP,所有这些都是开源的,可以免费使用。它是为动态网站和Web应用程序提供支持的最常见的软件堆栈。Linux是操作系统。Apache是Web服务器;MariaDB / MySQL是数据库服务器,PHP是负责生成动态网页的服务器端脚本语言。
先决条件
要遵循本教程,您需要在本地计算机或远程服务器上运行的Ubuntu 20.04/20.10 OS。
而且,如果您需要使用域名设置LAMP堆栈,我建议您从NameCheap购买域名,因为价格低廉,并且终身免费提供Whois隐私保护。
步骤1:更新软件包
在安装LAMP堆栈之前,最好先更新存储库和软件包。在Ubuntu 20.04/20.10 OS上运行以下命令。
sudo apt update && sudo apt upgrade
步骤2:安装Apache Web服务器
输入以下命令以安装Apache Web服务器。该 apache2-utils 软件包将安装一些有用的实用程序,例如Apache HTTP服务器基准测试工具(ab)。
sudo apt install -y apache2 apache2-utils
安装后,应自动启动Apache。用检查状态systemctl。
systemctl status apache2
样本输出:
● apache2.service - The Apache HTTP Server
     Loaded: loaded (/lib/systemd/system/apache2.service; enabled; vendor preset: enabled)
     Active: active (running) since Sat 2020-04-11 11:31:31 CST; 2s ago
       Docs: https://httpd.apache.org/docs/2.4/
    Process: 53003 ExecStart=/usr/sbin/apachectl start (code=exited, status=0/SUCCESS)
   Main PID: 53011 (apache2)
      Tasks: 55 (limit: 19072)
     Memory: 6.4M
     CGroup: /system.slice/apache2.service
             ├─53011 /usr/sbin/apache2 -k start
             ├─53012 /usr/sbin/apache2 -k start
             └─53013 /usr/sbin/apache2 -k start
提示:如果以上命令没有立即退出,您可以按Q键来获得对终端的控制。
如果它没有运行,请使用systemctl来启动它。
sudo systemctl start apache2
使Apache在系统启动时自动启动也是一个好主意。
sudo systemctl enable apache2
检查Apache版本:
apache2 -v
输出:
Server version: Apache/2.4.41 (Ubuntu)
Server built:   2020-03-05T18:51:00
现在,在浏览器地址栏中输入您的Ubuntu 20.04服务器的公共IP地址。您应该会看到“It works!” 网页,表示Apache Web服务器运行正常。如果要在本地Ubuntu 20.04计算机上安装LAMP,请 在浏览器地址栏中键入 127.0.0.1 或 localhost。

如果连接被拒绝或无法完成,则可能有防火墙阻止向TCP端口80的传入请求。如果使用iptables防火墙,则需要运行以下命令来打开TCP端口80。
sudo iptables -I INPUT -p tcp --dport 80 -j ACCEPT
如果使用的是UFW防火墙,请运行此命令打开TCP端口80。
sudo ufw allow http
现在,我们需要将www-data (Apache用户)设置 为文档根目录(也称为Web根目录)的所有者。默认情况下,它由root用户拥有。
sudo chown www-data:www-data /var/www/html/ -R
默认情况下,Apache使用系统主机名作为其global ServerName。如果无法在DNS中解析系统主机名,则在运行sudo apache2ctl -t命令后可能会看到以下错误。
AH00558: apache2: Could not reliably determine the server's fully qualified domain name, using 127.0.0.1. Set the 'ServerName' directive globally to suppress this message
为了解决这个问题,我们可以ServerName在Apache中设置一个全局变量。使用Nano命令行文本编辑器创建一个新的配置文件。
sudo nano /etc/apache2/conf-available/servername.conf
在此文件中添加以下行。
ServerName localhost
保存并关闭文件。要在Nano文本编辑器中保存文件,请按Ctrl+O,然后按Enter进行确认。要退出,请按Ctrl+X。然后启用此配置文件。
sudo a2enconf servername.conf
重新加载Apache以使更改生效。
sudo systemctl reload apache2
现在,如果sudo apache2ctl -t再次运行该命令,将不会看到以上错误消息。
打开地址重写模块,这个很重要!
sudo a2enmod rewrite
# sudo vi /etc/apache2/apache2.conf
# (没有的话,可以尝试sudo vi /etc/apache2/sites-available/000-default.conf)
# 打开apache配置文件

#实际目录根据网站根目录而定
#<Directory /var/www/>
#
#    Options Indexes FollowSymLinks
#    AllowOverride None  #改为All
#    Require all granted
#
#</Directory>
步骤3:安装MariaDB 或者 Mysql 数据库服务器
MariaDB 和 MySQL 选择安装其中之一就可以了! MySQL 和 MariaDB 之间的不兼容性!
MariaDB 的文档中列出了 MySQL 和 MariaDB 之间的数百个不兼容问题。因此,我们无法通过简单的方案在这两个数据库之间进行迁移。
大多数数据库管理员都希望 MariaDB 只是作为 MySQL 的一个 branch,这样就可以轻松地在两者之间进行迁移。但从最新发布的几个版本来看,这种想法是不现实的。MariaDB 实际上是 MySQL 的一个 fork,这意味着在它们之间进行迁移需要考虑很多东西。
1. 安装MariaDB:
MariaDB是MySQL的直接替代品。它是由MySQL团队的前成员开发的,他们担心Oracle可能会将MySQL变成开源产品。输入以下命令以在Ubuntu 20.04上安装MariaDB。
sudo apt install mariadb-server mariadb-client
安装后,MariaDB服务器应自动启动。使用systemctl检查其状态。
systemctl status mariadb
输出:
● mariadb.service - MariaDB 10.3.22 database server
     Loaded: loaded (/lib/systemd/system/mariadb.service; enabled; vendor preset: enabled)
     Active: active (running) since Fri 2020-04-10 14:19:16 UTC; 18s ago
       Docs: man:mysqld(8)
             https://mariadb.com/kb/en/library/systemd/
   Main PID: 9161 (mysqld)
     Status: "Taking your SQL requests now..."
      Tasks: 31 (limit: 9451)
     Memory: 64.7M
     CGroup: /system.slice/mariadb.service
             └─9161 /usr/sbin/mysqld
如果它没有运行,请使用以下命令启动它:
sudo systemctl start mariadb
要使MariaDB在启动时自动启动,请运行
sudo systemctl enable mariadb
2. 安装MySQL:
输入 y 和 ENTER 如果系统提示安装。
sudo apt install mysql-server
软件包安装程序完成后,我们可以检查MySQL服务是否正在运行。
sudo service mysql status
如果正在运行,您将看到绿色的活动状态,如下所示。
● mysql.service - MySQL Community Server
     Loaded: loaded (/lib/systemd/system/mysql.service; enabled; vendor preset: enabled)
     Active: active (running) since Mon 2020-04-02 02:40:59 CEST; 2min 47s ago
   Main PID: 18476 (mysqld)
     Status: "Server is operational"
      Tasks: 27 (limit: 4915)
     CGroup: /system.slice/mysql.service
             └─18476 /usr/sbin/mysqld

Apr 02 02:40:59 ubuntu2004 systemd[1]: Starting MySQL Community Server...
Apr 02 02:40:59 ubuntu2004 systemd[1]: Started MySQL Community Server.
q 如果使用SSH客户端,则可能需要按 退出服务状态。
配置MariaDB 或者 MySQL安全性
现在运行安装后的安全脚本。
sudo mysql_secure_installation
系统将询问您是否要设置“验证密码”插件。除非您出于某种原因要强制执行严格的密码策略,否则实际上并没有必要。
Securing the MySQL server deployment.

Connecting to MySQL using a blank password.

VALIDATE PASSWORD COMPONENT can be used to test passwords
and improve security. It checks the strength of password
and allows the users to set only those passwords which are
secure enough. Would you like to setup VALIDATE PASSWORD component?

Press y|Y for Yes, any other key for No:
直接点击 ENTER 如果你不想来设置验证密码插件。
接下来,将要求您删除匿名用户。
By default, a MySQL installation has an anonymous user,
allowing anyone to log into MySQL without having to have
a user account created for them. This is intended only for
testing, and to make the installation go a bit smoother.
You should remove them before moving into a production
environment.

Remove anonymous users? (Press y|Y for Yes, any other key for No) :
按 y 和 ENTER 删除匿名用户。
禁用远程根登录
Normally, root should only be allowed to connect from
'localhost'. This ensures that someone cannot guess at
the root password from the network.

Disallow root login remotely? (Press y|Y for Yes, any other key for No) :
按 y 和 ENTER 禁止远程root登录。
删除测试数据库
By default, MySQL comes with a database named 'test' that
anyone can access. This is also intended only for testing,
and should be removed before moving into a production
environment.

Remove test database and access to it? (Press y|Y for Yes, any other key for No) :
按 y 和 ENTER 删除测试数据库。
重新加载特权表
Reloading the privilege tables will ensure that all changes
made so far will take effect immediately.

Reload privilege tables now? (Press y|Y for Yes, any other key for No) :
按 y 和 ENTER 重新加载特权表。
全部完成! 
如果是 MariaDB 的话,可能会是以下情况:


测试MariaDB 或者 MySQL服务
Ubuntu 20.04 / 20.10上的LAMP Stack的MySQL组件现已准备就绪。
您应该登录MySQL服务器以确保其正常运行。因为您正在以身份运行此命令sudo,它将使用MySQL根帐户自动登录到MySQL。如果提示您输入密码,请输入Linux帐户密码,而不是MySQL密码
sudo mysql
输出:
Welcome to the MySQL monitor.  Commands end with ; or \g.
Your MySQL connection id is 15
Server version: 8.0.19-0ubuntu5 (Ubuntu)

Copyright (c) 2000, 2020, Oracle and/or its affiliates. All rights reserved.

Oracle is a registered trademark of Oracle Corporation and/or its
affiliates. Other names may be trademarks of their respective
owners.

Type 'help;' or '\h' for help. Type '\c' to clear the current input statement.

mysql>
要退出MySQL,请输入exit并按ENTER。
exit;
您现在已经在Ubuntu 20.04 / 20.10上为LAMP Stack成功安装并配置了MySQL!
测试MariaDB的方法也很简单,默认情况下,Ubuntu上的MariaDB软件包unix_socket用于验证用户登录,这基本上意味着您可以使用操作系统的用户名和密码登录MariaDB控制台。因此,您可以运行以下命令来登录,而无需提供MariaDB根密码。
sudo mariadb -u root
要退出,请运行
exit;
检查MariaDB服务器版本信息。
mariadb --version
如您所见,我们已经安装了MariaDB 10.3.22。
mariadb Ver 15.1 Distrib 10.3.22-MariaDB, for debian-linux-gnu (x86_64) using readline 5.2
步骤4:安装PHP7.4
Ubuntu 20.04 / 20.10上的LAMP Stack的下一个也是最后一个组件是PHP。
首先更新存储库并安装PHP软件包。我们还将安装两个软件包libapache2-mod-php 和php-mysql,这将允许PHP与MySQL数据库进行通信。
在系统提示安装PHP软件包时,按 y 和 ENTER。
sudo apt update && sudo apt install php libapache2-mod-php php-mysql
软件包安装完成后,我们可以在命令行中测试PHP。
php -version
如果PHP安装正确,您应该在下面看到类似的内容:
PHP 7.4.3 (cli) (built: Mar 26 2020 20:24:23) ( NTS )
Copyright (c) The PHP Group
Zend Engine v3.4.0, Copyright (c) Zend Technologies
    with Zend OPcache v7.4.3, Copyright (c), by Zend Technologies
要使用Apache服务器测试PHP脚本,我们需要info.php 在文档根目录中创建一个 文件。
sudo nano /var/www/html/info.php
将以下PHP代码粘贴到文件中。
<?php phpinfo(); ?>
要在Nano文本编辑器中保存文件,请按Ctrl+O,然后按Enter进行确认。要退出,请按Ctrl+X。现在,在浏览器地址栏中,输入 server-ip-address/info.php。替换 server-ip-address 为您的实际IP。如果您在本地计算机上遵循本教程,请输入 127.0.0.1/info.php 或 localhost/info.php。
您应该看到服务器的PHP信息。这意味着PHP脚本可以在Apache Web服务器上正常运行。

如何使用Apache运行PHP-FPM
使用Apache Web服务器运行PHP代码的方法基本上有两种:
- Apache PHP模块
- PHP-FPM。
在上述步骤中,Apache PHP7.4模块用于处理PHP代码,通常可以。但是在某些情况下,您需要使用PHP-FPM运行PHP代码。这是如何做。
禁用Apache PHP7.4模块。
sudo a2dismod php7.4
安装PHP-FPM。
sudo apt install php7.4-fpm
启用proxy_fcgi和setenvif模块。
sudo a2enmod proxy_fcgi setenvif
启用/etc/apache2/conf-available/php7.4-fpm.conf配置文件。
sudo a2enconf php7.4-fpm
重新启动Apache,以使更改生效。
sudo systemctl restart apache2
现在,如果您info.php在浏览器中刷新 页面,则会发现Server API从更改Apache 2.0 Handler为FPM/FastCGI,这意味着Apache Web服务器会将PHP请求传递给PHP-FPM。

恭喜!您已在Ubuntu 20.04上成功安装了LAMP堆栈(Apache,MariaDB,MySQL和PHP7.4)。
为了确保服务器的安全,您info.php现在应该删除文件以防窥视。
sudo rm /var/www/html/info.php
![]()
Related Posts
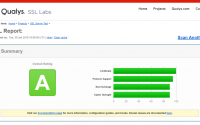
如何在Ubuntu 20.04/20.10上为Apache安装Let’s Encrypt SSL证书, How To Install a Let’s Encrypt SSL Cert for Apache on Ubuntu 20.04