简介 ACE是一个开源的、独立的、基于浏览器的代码编辑器,可以嵌入到任何WEB页面或者JavaScript应用程序中,ACE支持超过60种语言语法高亮,并能够处理代码多达400万行的大型文档。 特性 代码高亮 自动缩进 更换主题 搜索和替换支持正则表达式…
February 24, 2022
TinyMCE富文本编辑器, TinyMCE WYSIWYG编辑器, 网页嵌入式编辑器, 富文本web编辑器, web编辑器, html编辑器

简而言之: 我是宇宙第一的编辑器,我支持当前最流行的三个框架。
TinyMCE是一款易用、且功能强大的所见即所得的富文本编辑器。同类程序有:UEditor、Kindeditor、Simditor、CKEditor、wangEditor、Suneditor、froala等等。
TinyMCE的优势:
- 开源可商用,基于LGPL2.1
- 插件丰富,自带插件基本涵盖日常所需功能(示例看下面的Demo-2)
- 接口丰富,可扩展性强,有能力可以无限拓展功能
- 界面好看,符合现代审美
- 提供经典、内联、沉浸无干扰三种模式(详见“介绍与入门”)
- 对标准支持优秀(自v5开始)
- 多语言支持,官网可下载几十种语言。
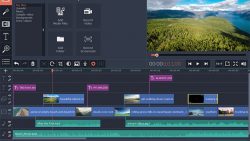
下图为部分功能的截图

官网及文档:www.tiny.cloud(右键)
官网下载:www.tiny.cloud/get-tiny/self-hosted/(右键)
Github:github.com/tinymce(右键)
DEMO: https://www.tiny.cloud/docs/demo/
快速入门:https://www.tiny.cloud/docs/quick-start/
语言包下载:https://www.tiny.cloud/get-tiny/language-packages/
插件下载: https://www.tiny.cloud/docs/plugins/
高级事件:https://www.tiny.cloud/docs/advanced/events/
三种模式
tinymce 有三种模式可选:经典模式(classic,默认)、行内模式(inline)、清爽模式(Distraction-free)。
经典模式是最常见的,也就是工具栏搭配输入区域,通过工具栏的按钮插入、修改、格式化内容,我们也选用这种模式作为业务的主要模式。
后两种模式也各有特点,但是与我们实际的应用场景不太匹配,故再次不多做介绍。有兴趣可以自行了解。
Q&A
tinymce收费吗?
tinymce主程序及自带的大部分插件均提供社区开源版,可免费使用且可商用。tinymce的主要盈利模式为【付费插件及拓展服务】,有关付费项目的列表,请参考:https://www.tiny.cloud/pricing
DEMO:最简单最经典的用法,只有2行代码:
 <script src="https://cdn.tiny.cloud/1/no-api-key/tinymce/5/tinymce.min.js" referrerpolicy="origin"></script>
 <script>tinymce.init({ selector:'textarea' });</script>
实例:
<!DOCTYPE html>
<html>
<head>
  <script src="https://cdn.tiny.cloud/1/no-api-key/tinymce/5/tinymce.min.js" referrerpolicy="origin"></script>
  <script>tinymce.init({ selector:'textarea' });</script>
</head>
<body>
  <textarea>Next, use our Get Started docs to setup Tiny!</textarea>
</body>
</html>
免费注册活动 API Key / Get a free Tiny Cloud API key
到这里就结束了,最简单的几行代码,就可以满足基本要求!如果你要深入了解更多,再往下读:
当然,你也可以自定义menu菜单和toolbar工具栏,例如:
配置语言
1. 可以将编辑器的语言配置为中文
tinymce.init({
    selector: '#myTextarea',
    language: 'zh_CN'
})
2. 可以设置language_url,覆盖默认地址。
tinymce.init({
    selector: '#myTextarea',
    language_url: 'https://fe.120yibao.com/common/tinymce/5.0.13/langs/zh_CN_01.js'
})
3. 也可以在项目中配置语言文件:
import Language from './language'
Tinymce.addI18n('zh_CN_01', Language)

tinymce.init({
    selector: '#myTextarea',
    language: 'zh_CN_01'
})
基础配置
以下配置大致涵盖了tinymce的基础配置,具体我会分章节在下面说明
tinymce.init({
    selector: '#myTextarea',
    // 编辑器的皮肤,有 oxide oxide-dark
    skin: 'dark',
    // 编辑器宽高
    width: 600,
    height: 300,
    // 用到的插件
    plugins: [
      'advlist autolink link image lists charmap print preview hr anchor pagebreak spellchecker',
      'searchreplace wordcount visualblocks visualchars code fullscreen insertdatetime media nonbreaking',
      'save table contextmenu directionality emoticons template paste textcolor'
    ],
    // 编辑区域内容样式
    content_css: 'css/content.css',
    // 工具栏的配置项
    toolbar: 'insertfile undo redo | styleselect | bold italic | alignleft aligncenter alignright alignjustify | bullist numlist outdent indent | link image | print preview media fullpage | forecolor backcolor emoticons'
  });
处理编辑器事件
1. 以下示例使用函数在编辑器初始化时创建控制台日志条目。这也是处理不返回任何数据的事件的示例。
tinymce.init({
  selector: 'textarea',
  setup: function(editor) {
    editor.on('init', function(e) {
      console.log('The Editor has initialized.');
    });
  }
});
2. 以下示例使用函数在编辑器中执行命令时创建控制台日志条目。这也是处理返回数据的事件的示例。
tinymce.init({
  selector: 'textarea',
  init_instance_callback: function(editor) {
    editor.on('ExecCommand', function(e) {
      console.log('The ' + e.command + ' command was fired.');
    });
  }
});
3. 编辑器初始化事件:
tinymce.init({
  selector: 'textarea',
  setup: function(editor) {
    editor.on('init', function(e) {
      console.log('The Editor has initialized.');
    });
  }
});
或者:
tinymce.init({
  selector: 'textarea',  // change this value according to your HTML
  init_instance_callback : function(editor) {
    console.log('Editor: ' + editor.id + ' is now initialized.');
  }
});

更多参考:https://www.tiny.cloud/docs/advanced/events/
4. 获取或者动态更换内容:
// getContent:从编辑器实例中获取内容

// Get the HTML contents of the currently active editor
console.debug(tinymce.activeEditor.getContent());

// Get the contents of the currently active editor as plain text
tinymce.activeEditor.getContent({format: 'text'});

// Get content of a specific editor:
tinymce.get('content id').getContent()

// setContent : 将指定的内容设置为编辑器实例

// Sets the HTML contents of the activeEditor editor
tinymce.activeEditor.setContent('<span>some</span> html');

// Sets the content of a specific editor (my_editor in this example)
tinymce.get('my_editor').setContent(data);

// Sets the content of the activeEditor editor using the specified format
tinymce.activeEditor.setContent('<p>Some html</p>', {format: 'html'});
使用插件
除了默认的配置,如果想拓展编辑器的功能,tinymce提供的方式就是插件。
官方的插件很丰富,文档也很详细,大多数情况下,我只需要官方提供的插件即可。
激活插件也很简单,只需要做了相应配置即可。
比如,我们想要拓展一个查看编辑器内容HTML源码的功能,只需要如下配置:
tinymce.init({
  selector: '#editor',
  plugins: 'code'
})
在menubar的位置,多了一个Tool的分组,分组里有一个source code的项,点击即可查看源码
如果我们不习惯使用menubar,而是习惯使用toolbar,我们只需要如下配置:
tinymce.init({
  selector: '#editor',
  toolbar: 'code',
  plugins: 'code'
})
toolbar位置上多了一个查看源码的图标,点击是相同的功能
有时候,这些基础的功能可能满足不了我们的需求,我们可能对这些插件进行配置。
tinymce.init({
  selector: '#editor',
   toolbar: "numlist bullist",
  plugins: 'lists'
})
示例中,我们配置了list组件,它支持无序(ul)列表和有序列表的功能,但是列表样式是固定的,我们可以引入新的插件advlist,并配置
tinymce.init({
  selector: '#editor',
  toolbar: 'bullist numlist',
  plugins: 'lists advlist'
})
此时,我们发现我们可以选择样式了,有多种样式供我们选择,如果我们想固定某种样式,我们可以这样配置:
tinymce.init({
  selector: '#editor',
  toolbar: 'bullist numlist',
  plugins: 'lists advlist',
  advlist_number_styles: 'lower-alpha'
})
自定义编辑器UI
theme 和 skin 我们直接使用默认的即可,无需折腾。
从上面的示例中,我们也知道基本上所有东西我们都可以去自定义的,比如隐藏不使用的menubar、调整按钮在toolbar中的位置等。
tinymce.init({
  selector: '#editor',
  // 隐藏menubar
  menubar: false,
  // 隐藏 statusbar
  statusbar: false,
  // 隐藏品牌标识
  branding: false,
  // 设置最大宽高
  max_height: 500,
  max_width: 500,
  // 设置最小宽高
  min_height: 100,
  min_width: 400
})
这些配置不太重要,一般一次配置之后就不会有改动。
插件配置
这里会写一下编辑器用到的插件的介绍、配置、和使用,太简单的插件和没用到的插件不在此说明。
Advanced Code Editor
此插件为付费插件
此插件可美化代码预览时候的视图,并且还有收起/展开标签的功能。配置此插件后,需要移除code插件。
tinymce.init({
  selector: "textarea",  // change this value according to your HTML
  plugins: "advcode",
  toolbar: "code"
});
AutoLink
此插件可在输入形如「www.qq.com」的链接时,自动将文本转化为超链接,空格和换行键都可以触发
tinymce.init({
  selector: "textarea",  // change this value according to your HTML
  plugins: "autolink"
});
nonbreaking
键盘的Tab键,默认是切换到下一个元素的focus。此可以改变这个默认行为。
需要注意的是,table插件中也有改变改默认行为的代码,所以要在table插件之后引用该插件。
tinymce.init({
  selector: "textarea",  // change this value according to your HTML
  plugins: "nonbreaking",
  // 此配置会改变默认行为,会在光标之后添加三个空格。
  nonbreaking_force_tab: true
});
autosave
此插件会自动保存编辑器的内容到localStorage。会同时存储两个字段,一个是内容,一个是存储时间。
可以配置自动保存的时间间隔,一般以秒为单位;也可以配置内容存储的过期时间,一般以分钟为单位,超过这个时间段,数据会从localStorage中被清除。
tinymce.init({
  selector: "textarea",  // change this value according to your HTML
  plugins: "autosave",
  // 自动保存的时间间隔
  autosave_interval: '30s',
  // 自动保存的数据存储的最大时间
  autosave_retention: '30m'
});
powerpaste
此插件为付费插件
此插件可以保留剪切板内容的样式、文档结构。
tinymce.init({
  selector: "textarea",  // change this value according to your HTML
  plugins: "powerpaste",
  /**
   * 粘贴前是否保留文本样式
   * @param 'clean' 不保留
   * @parma 'merge' 保留
   * @parma 'prompt' 询问用户
   */
  powerpaste_word_import: 'prompt',
  powerpaste_html_import: 'prompt',
  /**
   * 在粘贴到富文本之前,可以修改粘贴的内容。内容已经DOM格式化
   * @param plugin
   * @param args
   * @returns {Promise<void>}
   */
  paste_postprocess (plugin, args) {}
});
图片
tinymce 提供了丰富的图片上传、管理、修改功能。只需要配置对应插件及一些参数即可。
图片上传
引用image插件,添加images_upload_handler配置项,图片弹窗左侧导航会多一个上传的选项,在点击之后即可完成我们常用的图片上传功能
<template>
	<div class="default-tinymce">
		<textarea id="editor"></textarea>
	</div>
</template>
<script>
import Tinymce from 'tinymce'
import Upload from 'src/utils/upload'

export default {
  name: 'DefaultTinymce',
  mounted () {
    this.upload = new Upload()
    let self = this
    Tinymce.init({
      selector: '#editor',
      plugins: 'image',
      async images_upload_handler (blobInfo, success, fail) {
          const file = blobInfo.blob()
          try {
            const url = self.YB.businessURL(await self.upload.post(file))
            success(url)
          } catch (e) {
            fail(e.message || '上传失败,请重试')
          }
      }
    })
  }
}
</script>
图片管理
tinymce提供了类似个人图库和公共图库的功能。使用起来也很方便,只要配置即可。
这个我们暂时没有这个需求,以后可能会用到。
一种是下拉选择,配置image_list即可,值得注意的是,它的值可以是数组,函数,或者接口。
tinymce.init({
  selector: "textarea",  // change this value according to your HTML
  plugins: "image",
  image_list: [
    {title: 'Dog', value: 'mydog.jpg'},
    {title: 'Cat', value: 'mycat.gif'}
  ]
});

tinymce.init({
  selector: "textarea",  // change this value according to your HTML
  plugins: "image",
  image_list: "/mylist.php"
});

tinymce.init({
  selector: "textarea",  // change this value according to your HTML
  plugins: "image",
  image_list: function(success) {
    success([
      {title: 'Dog', value: 'mydog.jpg'},
      {title: 'Cat', value: 'mycat.gif'}
    ]);
  }
});
另一种是提供了一个按钮,点击这个按钮会触发相应的方法file_picker_callback,方法的参数中有回调函数,我们可以利用这个方法做一个个人图库。
tinymce.init({
  selector: 'textarea',  // change this value according to your HTML
  file_picker_callback: function(callback, value, meta) {
    // 以下是伪代码
    // 打开一个弹窗
    openDialog()
    // 展示图片列表
    showImageList()
    // 选择图片,确认选择
    const url = submitActiveImage()
    // 关闭弹窗,返回图片
    callback(url)
  }
});
图片编辑
图片编辑分为两部分,
一部分是对图片属性的编辑,比如边框、边距、宽度等,这部分其实就是对插件image的配置;
一部分是对图片自身的编辑,比如剪裁、调色等。这部分是基于插件image Tools的配置
image
image_caption
- 默认值
false - 可能值
[true/false]
图片下方增加对图片的描述文字。开启后,会在弹窗面板多一个显示标题的可选项。
config = {
  image_caption: true
}
这会生成新的结构
<figure class="image" contenteditable="false">
    <img src="https://imgtest.120yibao.com/test/base/obu1oj9a5fhy4ftku49.jpeg" alt="sdf" width="650" height="639">
    <figcaption contenteditable="true">图片底部</figcaption>
</figure>
image_class_list
- 值类型
string
可以下拉选择给图片加对应class
config = {
  image_class_list: [
    { title: '无', value: '' },
    { title: '自适应屏幕宽度', value: 'adaptive-screen-width' }
  ]
}
image_advtab
- 默认值
false - 可能值
[true/false]
图标编辑弹窗多了一个属性编辑的tab,包含外边距(margin),边框(border)的编辑。修改后,图片的style的属性值会被覆盖。
image_description
- 默认值
true - 可能值
[true/false]
对应img标签的alt属性
image_dimensions
- 默认值
true - 可能值
[true/false]
是否可以在弹窗中通过input设置图片的宽高
image Tools
此插件会编辑图片的原始数据。
编辑后自动上传
涉及修改图片原始数据的操作(如剪裁、翻转等),需要重新上传图片。可以配合服务端接口重新上传,也可以前端间接调用images_upload_handler方法进行上传。
我们看一下前端上传
function handleImageUrlToBlob (url, callback) {
   function imageToCanvas (src, cb) {
     const canvas = document.createElement('canvas')
     const ctx = canvas.getContext('2d')
     const img = new Image()
     img.src = src + '?t=2'
     img.crossOrigin = ''
     img.onload = function () {
       canvas.width = img.width
       canvas.height = img.height
       ctx.drawImage(img, 0, 0)
       cb(canvas)
     }
   }

   function dataURLToBlob (dataURL) {
     const arr = dataURL.split(',')
     const mime = arr[0].match(/:(.*?);/)[1]
     const bStr = atob(arr[1])
     let n = bStr.length
     const u8arr = new Uint8Array(n)
     while (n--) {
       u8arr[n] = bStr.charCodeAt(n)
     }
     return new Blob([u8arr], { type: mime })
   }

   function canvasToDataURL (canvas, format, quality) {
     return canvas.toDataURL(format || 'image/jpeg', quality || 1.0)
   }

   imageToCanvas(url, function (canvas) {
     callback(dataURLToBlob(canvasToDataURL(canvas)))
   })
 }

tinymce.init({
  // 此两项在使用imagetools插件时必填,只在使用服务端上传时有用。但前端使用了其他方法获取图片(imagetools_fetch_image),所以随便写了些值
  imagetools_cors_hosts: [],
  imagetools_proxy: 'just a string and do nothing',
  // 修改图片之后,获取图片
  imagetools_fetch_image: image => {
    return new tinymce.util.Promise(function (resolve) {
      // 需要将图片转为blob格式
      handleImageUrlToBlob(image.src, resolve)
    })
  },
})
修改完图片之后,编辑器会在图片失去焦点之后自动上传图片,并生成新的URL替换掉之前的。
编辑功能列表配置
imagetools_toolbar可配置编辑功能列表
tinymce.init({
  selector: "textarea",
  toolbar: "image",
  plugins: "image imagetools",
  imagetools_toolbar: "rotateleft rotateright | flipv fliph | editimage imageoptions"
});
格式化
有时候你需要对内容进行一些格式化,例如改变字体大小、将内容转换为标题,或者直接清除选择内容的所有样式。这不需要引入插件,至于要配置即可。
tinymce.init({
  selector: "textarea",
  /**
   * 「块」样式格式化
   */
  block_formats: '段落=p; 标题 1=h1; 标题 2=h2; 标题 3=h3; 标题 4=h4; 标题 5=h5; 标题 6=h6;',

  /**
   * 工具栏「段落」下拉组件的默认值
   */
  style_formats: [
      { title: 'Headings',
        items: [
          { title: 'Heading 1', format: 'h1' },
          { title: 'Heading 2', format: 'h2' },
          { title: 'Heading 3', format: 'h3' },
          { title: 'Heading 4', format: 'h4' },
          { title: 'Heading 5', format: 'h5' },
          { title: 'Heading 6', format: 'h6' }
        ] },
      { title: 'Inline',
        items: [
          { title: 'Bold', format: 'bold' },
          { title: 'Italic', format: 'italic' },
          { title: 'Underline', format: 'underline' },
          { title: 'Strikethrough', format: 'strikethrough' },
          { title: 'Superscript', format: 'superscript' },
          { title: 'Subscript', format: 'subscript' },
          { title: 'Code', format: 'code' }
        ] },
      { title: 'Blocks',
        items: [
          { title: 'Paragraph', format: 'p' },
          { title: 'Blockquote', format: 'blockquote' },
          { title: 'Div', format: 'div' },
          { title: 'Pre', format: 'pre' }
        ] },
      { title: 'Align',
        items: [
          { title: 'Left', format: 'alignleft' },
          { title: 'Center', format: 'aligncenter' },
          { title: 'Right', format: 'alignright' },
          { title: 'Justify', format: 'alignjustify' }
        ] }
    ],
  /**
   * 字体大小可选列表
   */
  fontsize_formats: '12px 14px 16px 18px 24px 36px 48px',
  /**
   * 格式化
   */
  formats: {
    // 清除格式
    removeformat: [
      {
        selector: 'b,strong,em,i,font,u,strike,sub,sup,dfn,code,samp,kbd,var,cite,mark,q,del,ins',
        remove: 'all',
        split: true,
        block_expand: true,
        expand: false,
        deep: true
      },
      {
        selector: 'span',
        attributes: ['style', 'class'],
        remove: 'empty',
        split: true,
        expand: false,
        deep: true },
      {
        selector: '*',
        attributes: ['style', 'class'],
        split: false,
        expand: false,
        deep: true
      }
    ]
  }
});
转换外链图片
如果粘贴过来的内容中有图片,并且图片是外链图片。可能需要把这些外链图片转换成自己服务器的地址,这需要后端配合:给后端这些图片的url,后端返回给你自己的url,由后端完成图片上传。
如果粘贴内容中的图片是base64,会自动触发之前配置的images_upload_handler图片上传钩子,自动上传图片。
这一块的实现比较复杂,我不贴代码,只说下大致思路:
- 在
paste_postprocess方法中标注这些外链图片 - 然后监听编辑器的内容插入事件(
mceInsertContent),在事件的回调方法中,将这些标注的外链图片进行转化。
需要注意的是,因为一些图片的提供者会对图片进行保护,服务器不一定你传过去的每张图片都能传到自己的服务器,需要和后端约定处理方法。
封装成Vue组件
首先,我们要实现Vue的双向绑定:在编辑器内容改变的时候,更新ViewModel;ViewModel改变的时候,更新编辑器的内容。
实现起来很简单,我们可以监听可以改变编辑器内容的事情,以及使用vm.$watch监听值的变化
<template>
	<div class="editor-wrap">
		<textarea v-model="value" class="editor-textarea"></textarea>
	</div>
</template>
<script>
export default {
  name: 'TinymceEditor',
  model: {
    prop: 'value',
    event: 'change'
  },
  props: {
    value: {
      type: String,
      required: true,
      default: ''
    }
  },
  async mounted () {
    try {
      const self = this
      const editor = await Tinymce.init({
          selector: '.editor-textarea',
          // 编辑器实例初始化完成的回调
          init_instance_callback: editor => {
              // 数据双向绑定
              self.$nextTick(() => {
                  let currentContent = ''
                  // 双向绑定数据
                  self.$watch('value', (val, prevVal) => {
                    if (editor && typeof val === 'string' && val !== currentContent && val !== prevVal) {
                      editor.setContent(val)
                      currentContent = val
                    }
                  })
                  editor.on('change keyup undo redo', () => {
                    currentContent = editor.getContent()
                    self.$emit('change', currentContent)
                  })
              })
          }
        })
        this.editor = editor[0]
    } catch (e) {
      this.$error(e)
    }
  }
}
</script>
自定义插件
Tinymce官方提供了丰富的插件,足以满足关于一般富文本的需求,也可以通过进一步的配置,让其更符合实际的业务场景。但是,如果这还满足不了你的需求,想进一步的定制化呢?
Tinymce提供了丰富的接口,用以编写自定义的插件。并且,官方的插件源码也非常清晰易懂,在写自己的插件的时候,可以做一个详细的参考。
编写插件
其实编写一个插件很简单,只需要做3件事情。
- 制作一个Svg格式的图标,这个图标用于在工具栏(toolbar)的展示。(按钮长什么样)
- 给工具栏新增一个按钮,并给这个按钮设置点击、下拉等要触发的事件。(按钮可以做什么)
- 注册一个命令,对按钮的操作可以触发这个命令,命令的回调方法里对编辑器内容进行操作。(具体怎么做)
行高插件
因为公司这边的业务要求时,开发一个功能与微信公众号文章编辑器基本功能对称的富文本编辑器。而微信编辑器有一个设置行高的功能,Tinymce官方没有提供,虽然可以通过配置格式化样式进行简单的开发,但为了统一体验,就仿照微信编辑器在工具栏新增了一个可以设置行距的按钮。
import Tinymce from 'tinymce'

Tinymce.PluginManager.add('lineheight', function (editor) {
  // 执行方法
  const actionFunction = function (editor, val) {
    const value = val || editor.getParam('lineheight_default_value', 1.5)
    editor.formatter.apply('lineheight', { value })
  }

  // 命令
  editor.addCommand('mceLineHeight', function (ui, value) {
    actionFunction(editor, value)
  })

  // toolbar 按钮 图标
  editor.ui.registry.addIcon('lineheight', `
    <svg xmlns="http://www.w3.org/2000/svg" width="24" height="24" viewBox="0 0 24 24">
      <path d="M5,5 L19,5 L19,7 L5,7 L5,5 Z M13,9 L19,9 L19,11 L13,11 L13,9 Z M13,13 L19,13 L19,15 L13,15 L13,13 Z M5,17 L19,17 L19,19 L5,19 L5,17 Z M11.07,11.46 L8.91,9.84 L6.75,11.46 L5.79,10.18 L8.43,8.2 C8.71444444,7.98666667 9.10555556,7.98666667 9.39,8.2 L12.03,10.18 L11.07,11.46 Z M8.91,14.16 L11.07,12.54 L12.03,13.82 L9.39,15.8 C9.10555556,16.0133333 8.71444444,16.0133333 8.43,15.8 L5.79,13.82 L6.75,12.54 L8.91,14.16 Z" id="行间距"></path>
    </svg>
  `)

  // toolbar 按钮功能
  editor.ui.registry.addSplitButton('lineheight', {
    tooltip: '行间距',
    // 图标
    icon: 'lineheight',
    // 初始化
    onSetup (api) {
      editor.formatter.register({
        lineheight: {
          selector: 'p,h1,h2,h3,h4,h5,h6,table,td,th,div,ul,ol,li,section,article,header,footer,figcaption',
          styles: { 'line-height': '%value' }
        }
      })
    },
    // 图标点击
    onAction (api) {
      return editor.execCommand('mceLineHeight')
    },
    // 列表项点击
    onItemAction (buttonApi, value) {
      return editor.execCommand('mceLineHeight', false, value)
    },
    // 初始化列表
    fetch (callback) {
      const items = [
        {
          type: 'choiceitem',
          text: '1',
          value: 1
        },
        {
          type: 'choiceitem',
          text: '1.5',
          value: 1.5
        },
        {
          type: 'choiceitem',
          text: '1.75',
          value: 1.75
        },
        {
          type: 'choiceitem',
          text: '2',
          value: 2
        },
        {
          type: 'choiceitem',
          text: '3',
          value: 3
        },
        {
          type: 'choiceitem',
          text: '4',
          value: 4
        },
        {
          type: 'choiceitem',
          text: '5',
          value: 5
        }
      ]
      callback(items)
    }
  })
})
这个插件只是对当前内容的一种格式化。比较简单。
引入时机
插件一定要在tinymce引入之后,实例初始化之前引入。如果插件出现重名,会优先使用自己项目中的插件。换言之,初始化的时候,会先找已注册的插件,没有找到的话,会根据配置,去相对路径取插件文件。
import Tinymce from 'tinymce'
import './plugins/lineheight'

Tinymce.init({
    selector: '.textarea',
    plugins: ['lineheight']
})
预览插件
因为编辑器自带的插件不能满足业务需求,所以自己写了一个预览插件。
import Tinymce from 'tinymce'

Tinymce.PluginManager.add('preview', function (editor) {
  const adaptStyle = `
    body {
      width: 375px !important;
      height: 667px !important;
      overflow-x: hidden !important;
      overflow-y: auto !important;
      margin: 0 !important;
      padding: 0 !important;
      font-size: 17px;
    }
    .adaptive-screen-width {
      width: 100% !important;
      height: auto;
    }

  `

  const Settings = {
    getContentStyle (editor) {
      return editor.getParam('content_style', '')
    },
    shouldUseContentCssCors (editor) {
      return editor.getParam('content_css_cors', false, 'boolean')
    },
    getBodyId (editor) {
      let bodyId = editor.settings.body_id || 'tinymce'
      if (bodyId.indexOf('=') !== -1) {
        bodyId = editor.getParam('body_id', '', 'hash')
        bodyId = bodyId[editor.id] || bodyId
      }
      return bodyId
    },
    getBodyClass (editor) {
      let bodyClass = editor.settings.body_class || ''
      if (bodyClass.indexOf('=') !== -1) {
        bodyClass = editor.getParam('body_class', '', 'hash')
        bodyClass = bodyClass[editor.id] || ''
      }
      return bodyClass
    },
    getDirAttr (editor) {
      const encode = editor.dom.encode
      let directionality = editor.getBody().dir
      return directionality ? ' dir="' + encode(directionality) + '"' : ''
    }
  }

  const getPreviewFrame = function (editor) {
    // <head>
    let headHtml = ''
    const encode = editor.dom.encode
    const contentStyle = Settings.getContentStyle(editor)
    headHtml += `<base href="${encode(editor.documentBaseURI.getURI())}">`
    if (contentStyle) {
      headHtml += `<style type="text/css">${contentStyle + adaptStyle}</style>`
    }
    const cors = Settings.shouldUseContentCssCors(editor) ? ' crossorigin="anonymous"' : ''
    Array.from(editor.contentCSS).forEach(url => {
      headHtml += `<link type="text/css" rel="stylesheet" href="${encode(editor.documentBaseURI.toAbsolute(url))}" ${cors}>`
    })
    // <body>
    const bodyId = Settings.getBodyId(editor)
    const bodyClass = Settings.getBodyClass(editor)
    const dirAttr = Settings.getDirAttr(editor)
    // 禁用点击事件
    const preventClicksOnLinksScript = '<script>document.addEventListener && document.addEventListener("click", function(e) {for (var elm = e.target; elm; elm = elm.parentNode) {if (elm.nodeName === "A") {e.preventDefault();}}}, false);</script> '
    // html
    const html = `
      <!DOCTYPE html>
        <html lang="zh_cn">
          <head>${headHtml}</head>
          <body id="${encode(bodyId)}" class="mce-content-body ${encode(bodyClass)}" ${dirAttr}>
            ${editor.getContent()}
            ${preventClicksOnLinksScript}
          </body>
        </html>
    `
    // iframe
    return `
      <iframe sandbox="allow-scripts allow-same-origin" frameborder="0" width="395" height="667" srcdoc="${encode(html)}">
      </iframe>
    `
  }

  const getPreviewDialog = function (editor) {
    let frame = getPreviewFrame(editor)
    const id = 'tinymce-editor-preview-dialog-wrapper'
    const closeEvent = `
      onclick="document.getElementById('${id}').remove()"
    `
    const dialog = document.createElement('div')
    dialog.id = id
    dialog.innerHTML = `
      <div class="tinymce-editor-preview-dialog-mask"></div>
      <div class="tinymce-editor-preview-dialog">
        <div class="tinymce-editor-preview-dialog-header">
            <div class="tinymce-editor-preview-dialog-header-title">预览</div>
            <div class="tinymce-editor-preview-dialog-header-close" ${closeEvent} title="关闭">
              <svg width="24" height="24" xmlns="http://www.w3.org/2000/svg">
                <path d="M17.953 7.453L13.422 12l4.531 4.547-1.406 1.406L12 13.422l-4.547 4.531-1.406-1.406L10.578 12
                 6.047 7.453l1.406-1.406L12 10.578l4.547-4.531z" fill-rule="evenodd"></path>
              </svg>
            </div>
        </div>
        <div class="tinymce-editor-preview-dialog-body">${frame}</div>
        <div class="tinymce-editor-preview-dialog-footer">
            <div class="tinymce-editor-preview-dialog-footer-btn" ${closeEvent}>关闭</div>
        </div>
      </div>
    `
    return dialog
  }

  const actionFunction = (editor, value) => {
    const dialog = getPreviewDialog(editor)
    if (document.getElementById(dialog.id)) {
      console.warn('当前页面只能有一个弹窗')
    } else {
      document.body.appendChild(dialog)
    }
  }

  editor.addCommand('mcePreview', function () {
    actionFunction(editor)
  })

  editor.ui.registry.addButton('preview', {
    icon: 'preview',
    tooltip: 'Preview',
    onAction: function () {
      return editor.execCommand('mcePreview')
    }
  })
})
这个插件根据编辑器官方的预览插件改写而成,定制化了一些样式。如前所述,因为与官方插件重名,所以官方的插件文件将不再会被加载。这个插件比行高插件稍微复杂了点,但是它没有对内容进行改动。
本文:TinyMCE富文本编辑器, TinyMCE WYSIWYG编辑器, 网页嵌入式编辑器, 富文本web编辑器, web编辑器, html编辑器
![]()
Related Posts

5个响应式全屏背景图片变换插件 5 jQuery Responsive Fullscreen Background Image Plugins
jQuery 插件: 识别浏览器, 判断浏览器类型和版本, browser detection